
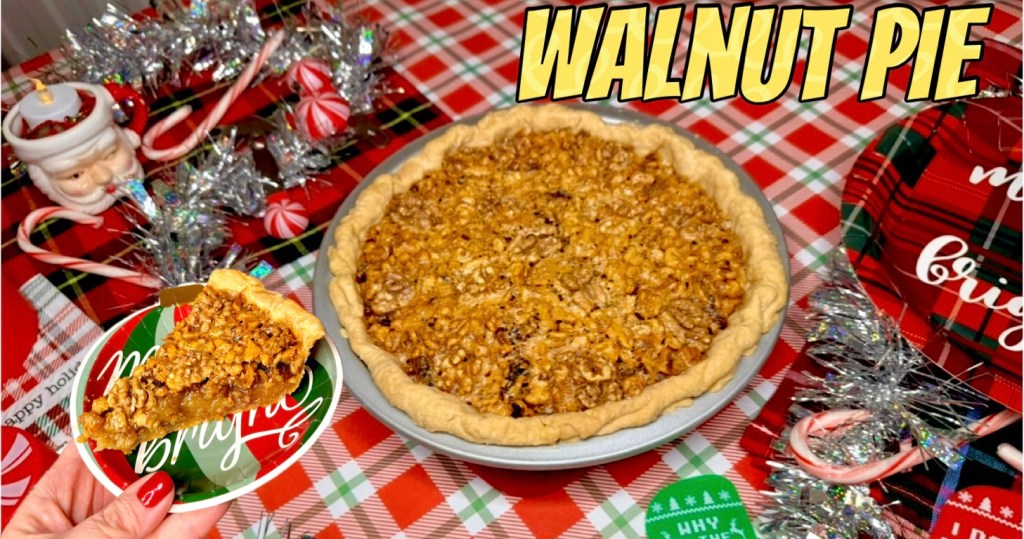
Looking for the perfect holiday dessert? This Walnut Pie with a Homemade Pie Crust is a festive and delicious addition to your Christmas celebration! With its buttery, flaky crust and rich walnut filling, this pie is sure to impress your family and friends.

In this step-by-step recipe, you’ll learn:
•How to make a perfect pie crust from scratch
•Tips for preparing a sweet and nutty walnut filling
•Secrets to baking a beautiful and flavorful holiday pie
Whether you’re planning your Christmas dinner menu or need a show-stopping dessert, this walnut pie is a must-try! It’s easy to make, packed with flavor, and guaranteed to bring holiday cheer.
Perfect for:
• Christmas desserts
• Holiday baking
• Family gatherings
Give your holiday table a sweet twist with this irresistible walnut pie recipe. Don’t forget to like, comment, and subscribe for more holiday recipes and baking inspiration!

I want to start this recipe by talking pie crust. The pie crust is the foundation of a great pie. Whether you use my homemade pie crust recipe or a store bought pie crust, it should be par baked when using a liquid filling like this walnut pie, a pecan pie, a pumpkin pie, a custard pie, etc. With the right tools, though, it is an easy thing to do and I’ll show you how.
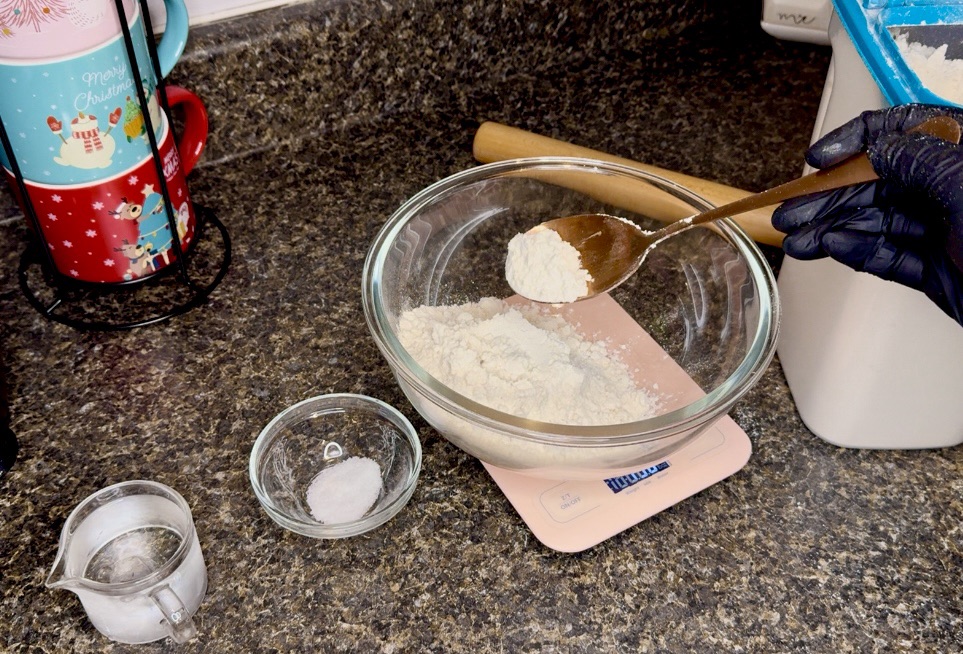
I recommend using a food scale like this one from Amazon, for your dry measurements. It helps with accuracy.

Make sure your butter is cold cold cold, straight from the fridge! I cut it into small cubes. Side note, how cute is this Christmas mug set with stand from Amazon. I used them to make Holiday coffee drinks using target’s holiday whipped creams.
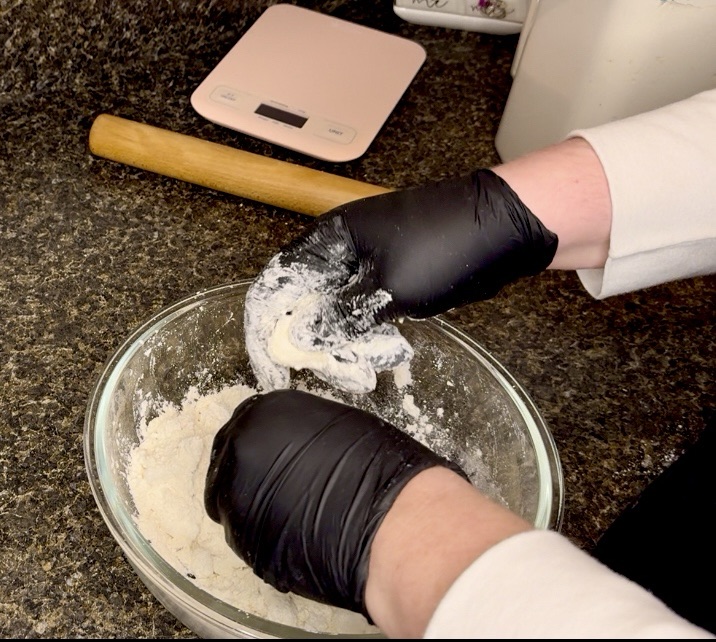
You can mix the dry ingredients and butter in a food processor but you should add the water by hand. If mixing the cold butter by hand like I did for this pie crust recipe, smoosh each butter cube into a shard using your fingers and make sure each shard is covered in flour. Disposable gloves help, especially if you have naturally hot hands.

Make sure your water is ice cold too. I put a piece of ice in my glass measuring cup from Amazon to keep it cold but don’t get the ice into the dough itself. Start with a little water and add more as needed. You don’t want your pie dough too soft because it becomes sticky. You want to just hydrate your pie dough.
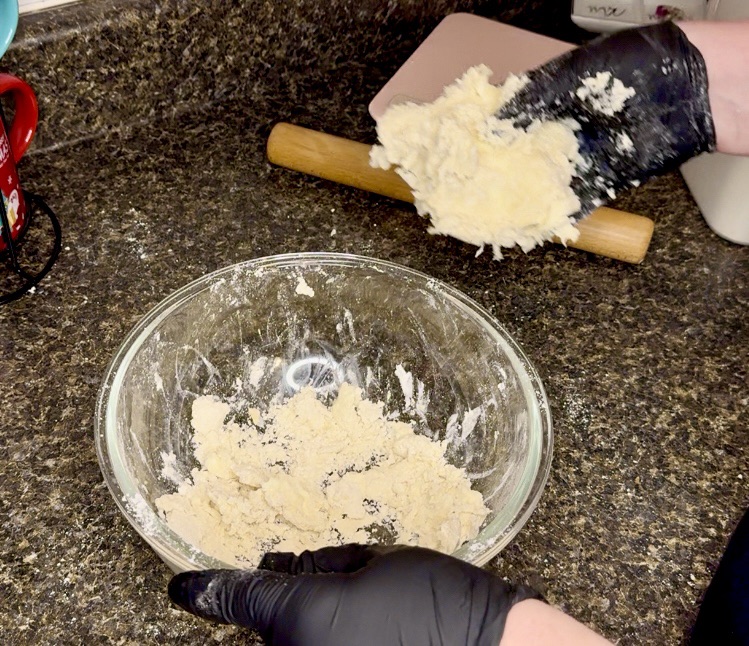
The portion of my pie dough in my hand is hydrated so I’m going to remove it and add a little more ice cold water to the dry bits left in the bowl and then incorporate the dough all together. This helps to make sure all the flour is hydrated while using the least amount of water. My Walnut pie video helps show more of the process if you’re interested.
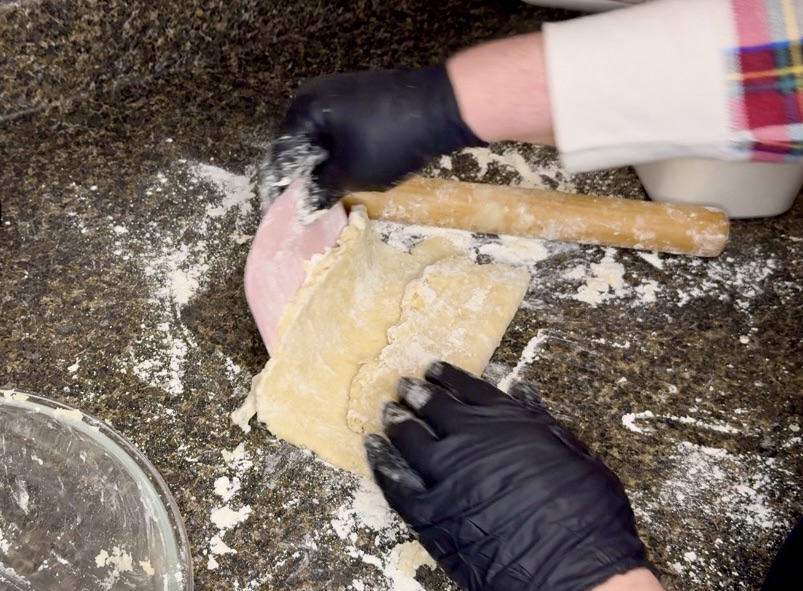
I roll out the pie dough just a little bit at first to get a couple folds into the pie dough, using my bench scraper if it sticks to the counter too much. The extra folds help to make a flakey pie crust. All product links in this recipe are from Amazon.
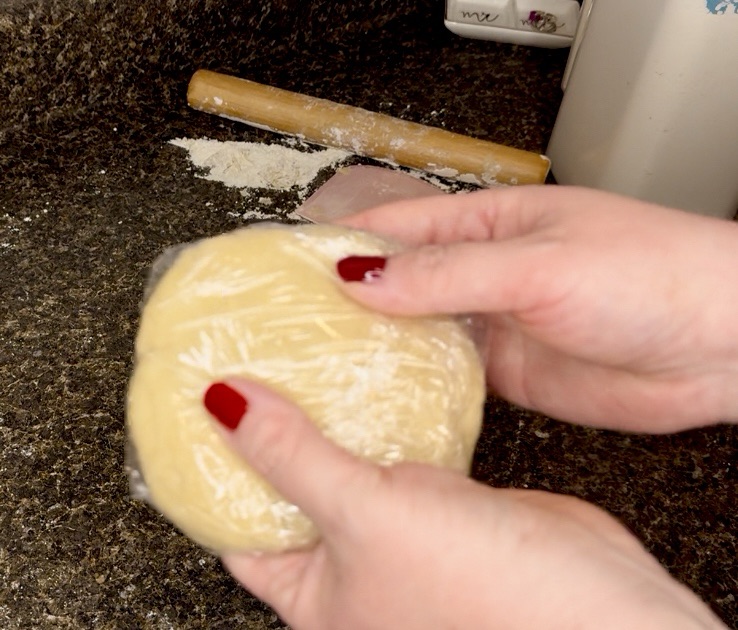
Then I form the pie crust into a disc shape, wrap in Saran Wrap and store in the fridge for at least 2 hours for the butter to harden back up, but can be stored overnight to make your life easier when making a holiday dessert.

Then you use your bamboo rolling pin to roll out your pie dough. I use my bench scraper for this part too so that I don’t accidentally rip my pie dough. Plus it helps to use a little less flour so your pie crust isn’t too dry.
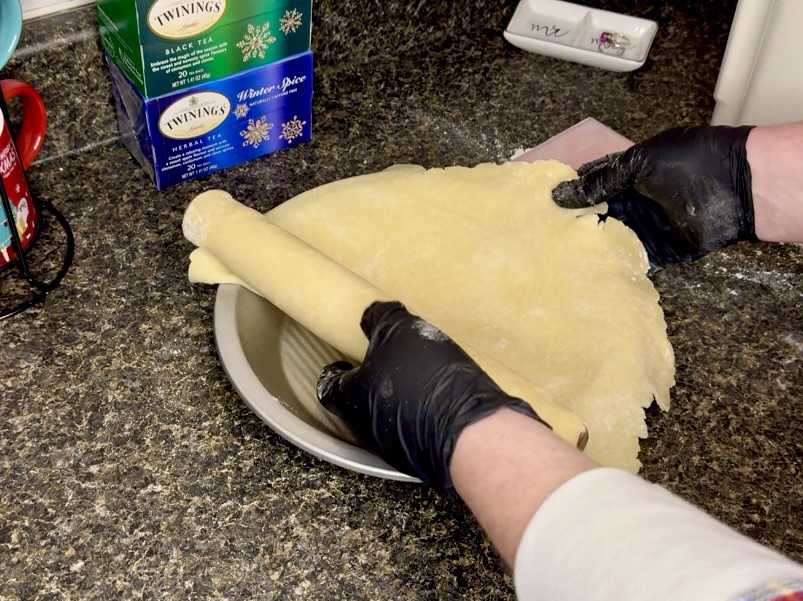
I wrap the pie dough around my rolling pin to help transport it to the pie pan. And while we’re on the subject, I highly recommend a metal pie pan . I love a ceramic pie pan because they’re more festive and pretty but the metal pie pans create more heat which cooks your pie crust more evenly and effectively.
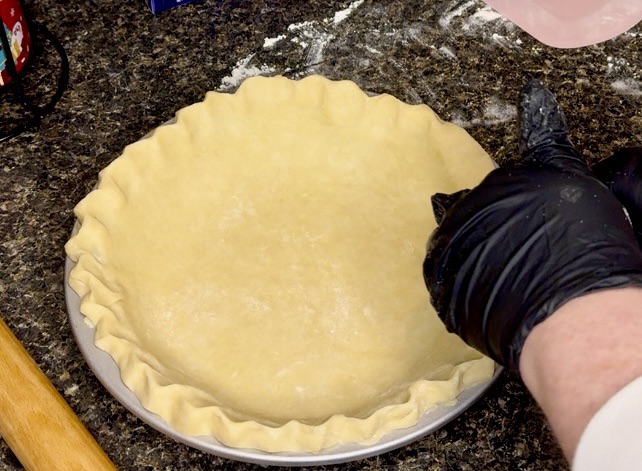
Give your pie crust a little crimp using your index finger on the inside part and your thumb and index finger of your other hand on the outside and you push the pie crust in an indent to make this easy design.
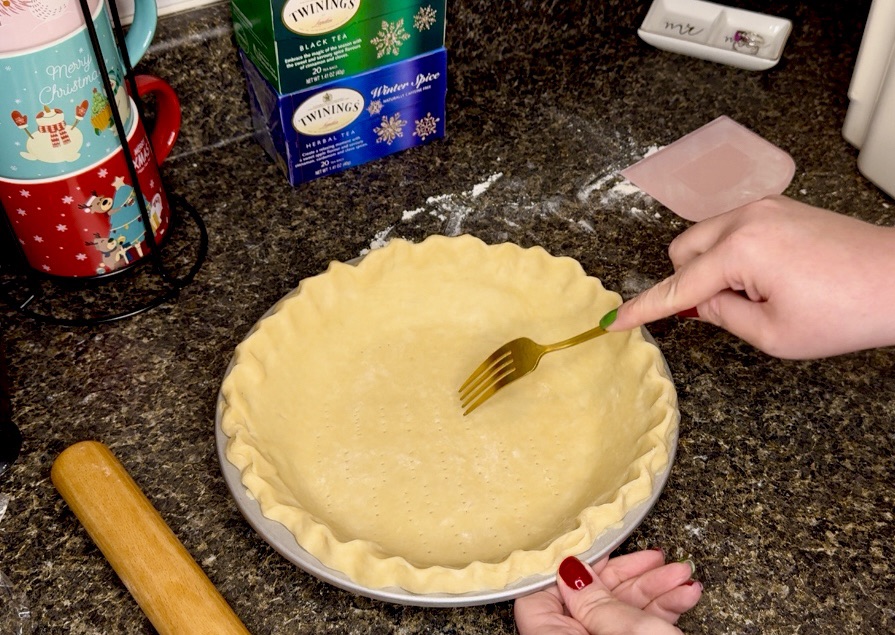
Then use a fork to poke holes all around the bottom and sides of your homemade pie crust. This helps to keep it from puffing up when baking. It is much easier to do before chilling it again.
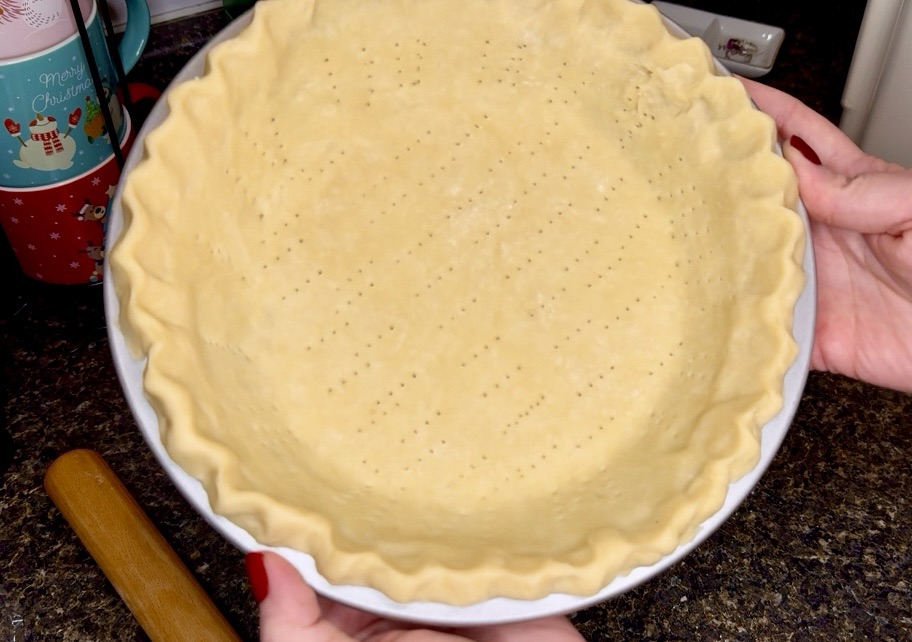
Then chill your homemade pie crust one more time. Again, this can be done ahead of time so it’s less you have to worry about the day of making your pie.
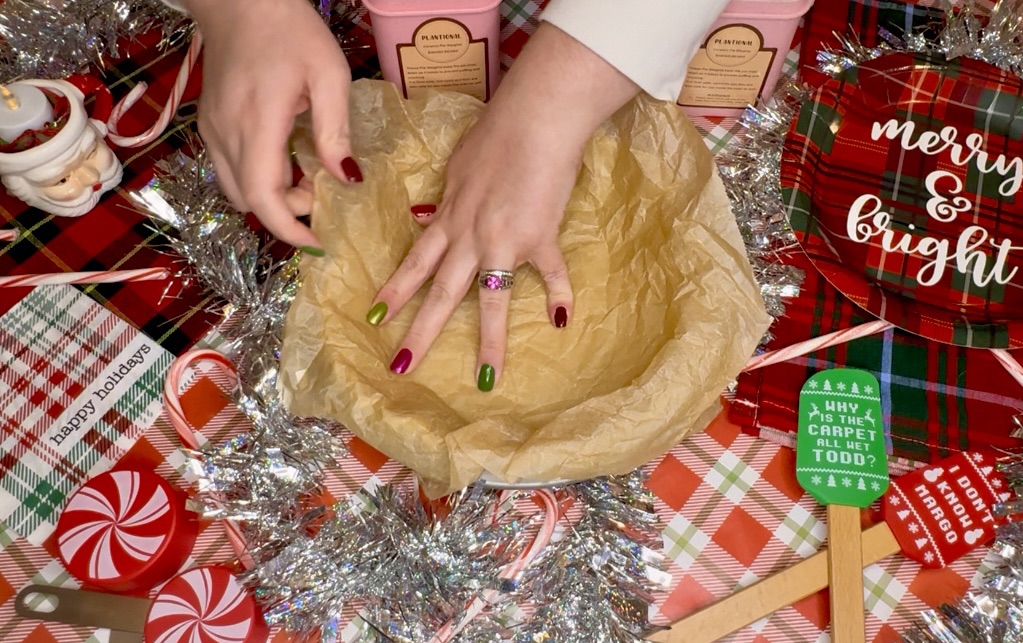
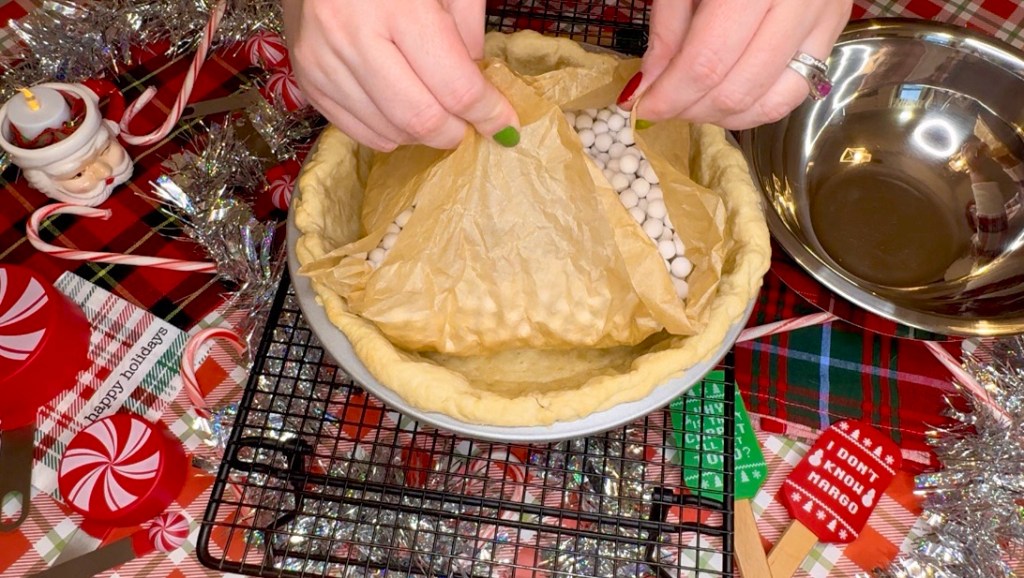
To par bake your pie crust, which means partially baking because we’re going to bake it again after we add the walnut filling, add a piece of parchment paper to your chilled pie dough. I like the crumple my parchment paper first because it makes it easier to form to the crust.
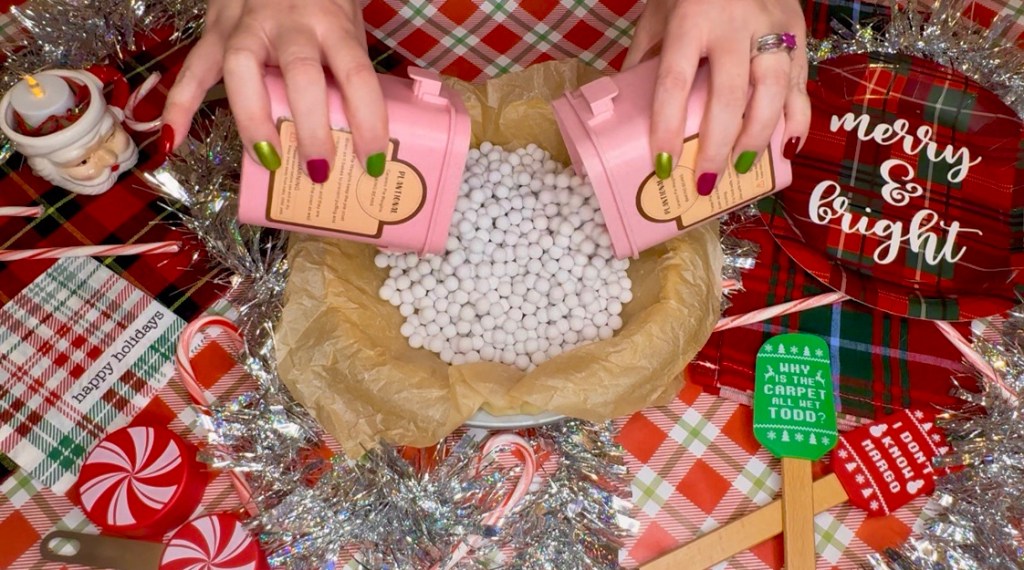
You must weigh down your pie crust or it will shrink. I highly recommend these ceramic pie weights because they’re reusable and are nice and heavy. You can use dry beans or even uncooked rice. The most important part, though, is to make sure your weights fill up the whole pie, not just the bottom. The weights need to keep the sides in their place so your pie crust doesn’t shrink.
After you par bake your pie crust, remove the pie weights using the parchment paper and place into a bowl that can withstand heat, like this metal bowl from a set and then let those weights cool before you touch them.
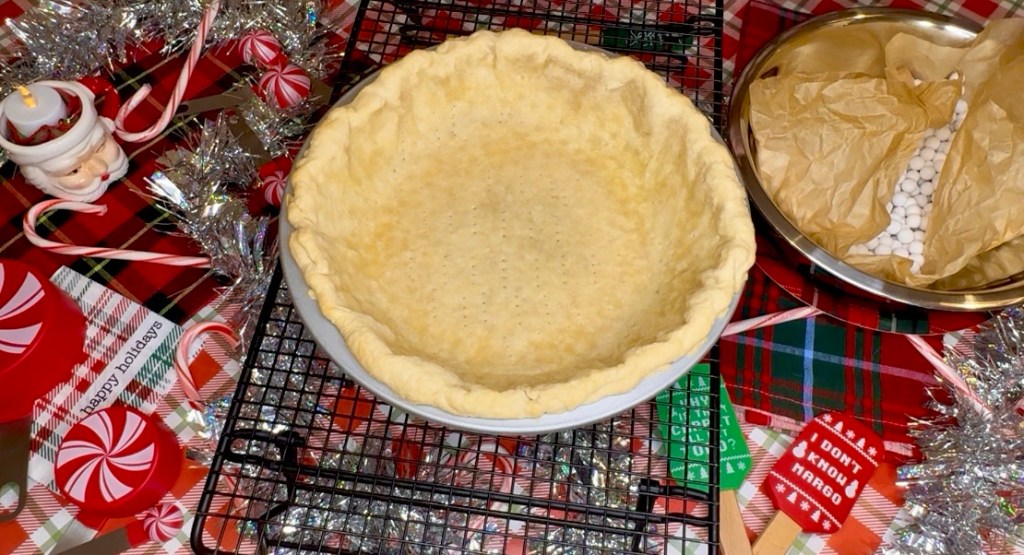
Then finish par baking your pie crust so the bottom isn’t raw or you’ll have a soggy bottom situation and that’s no fun. You want your pie crust just set and no longer translucent. If you’re making a pie using this homemade pie crust recipe that has a filling you don’t bake again, like a pudding pie, you’ll want to fully blind bake your crust until it’s golden. So that means just keeping it in the oven longer and letting cool completely before adding your pie filling.
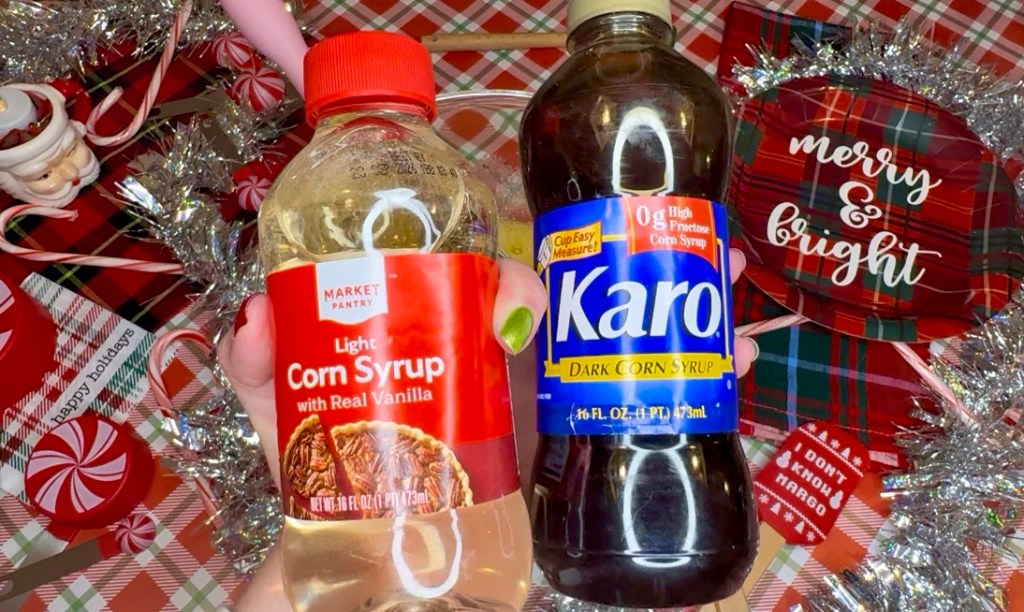
On to the walnut pie filling itself. I use dark and light corn syrup for a more complex pie filling flavor but if you don’t want to buy two different ones, either one would work just fine.
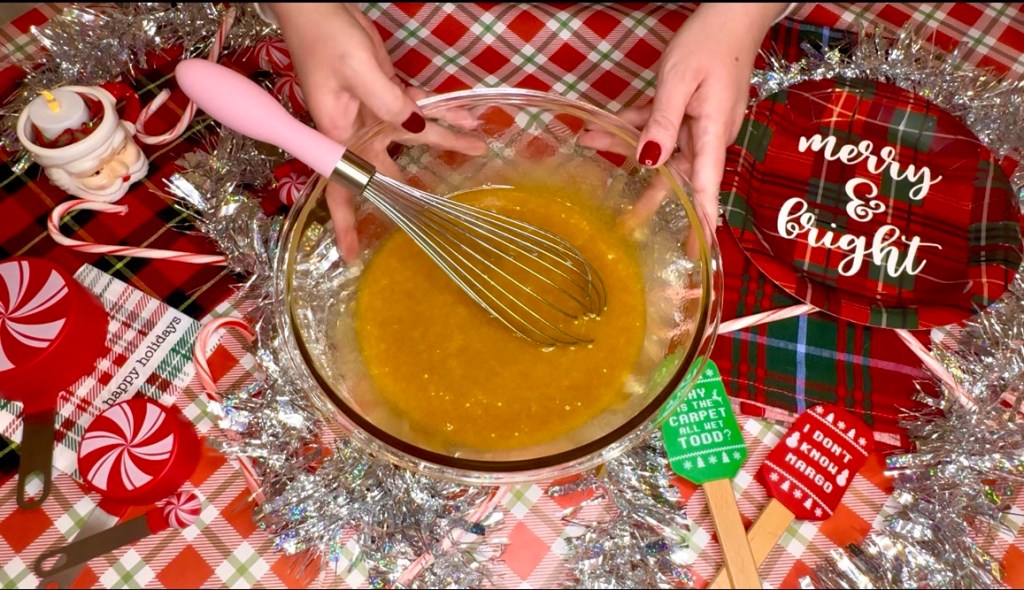
The walnut pie filling itself is easy to whip up and I just use a whisk instead of a hand mixer because that’s just too much work after making such a glorious homemade pie crust.
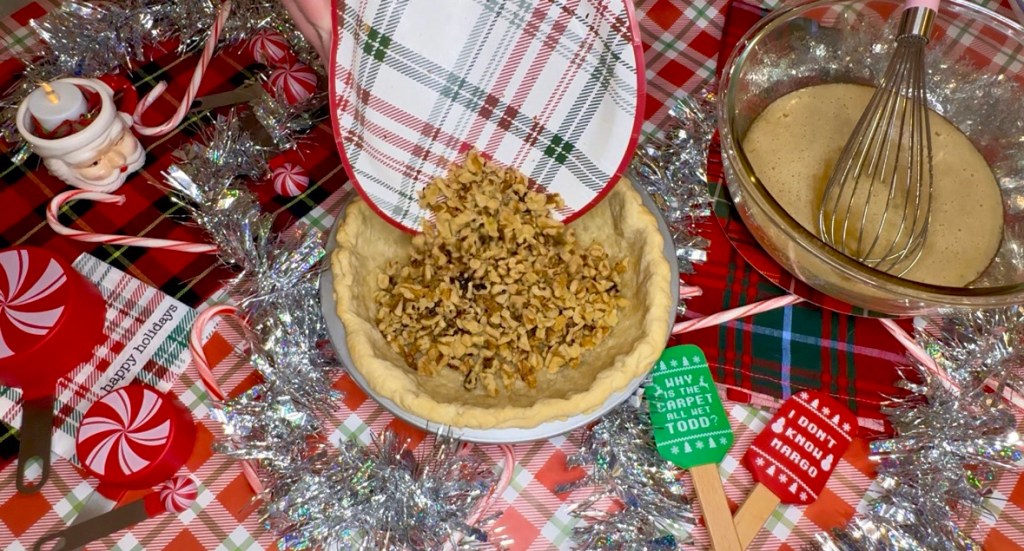
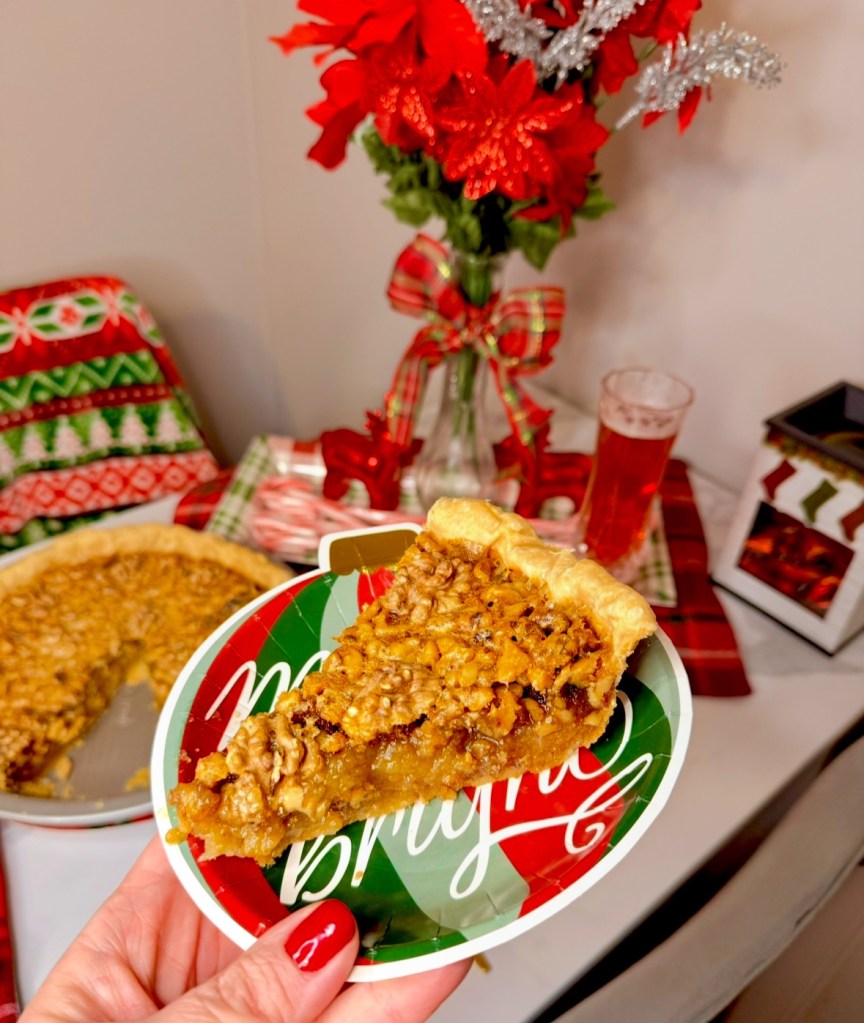
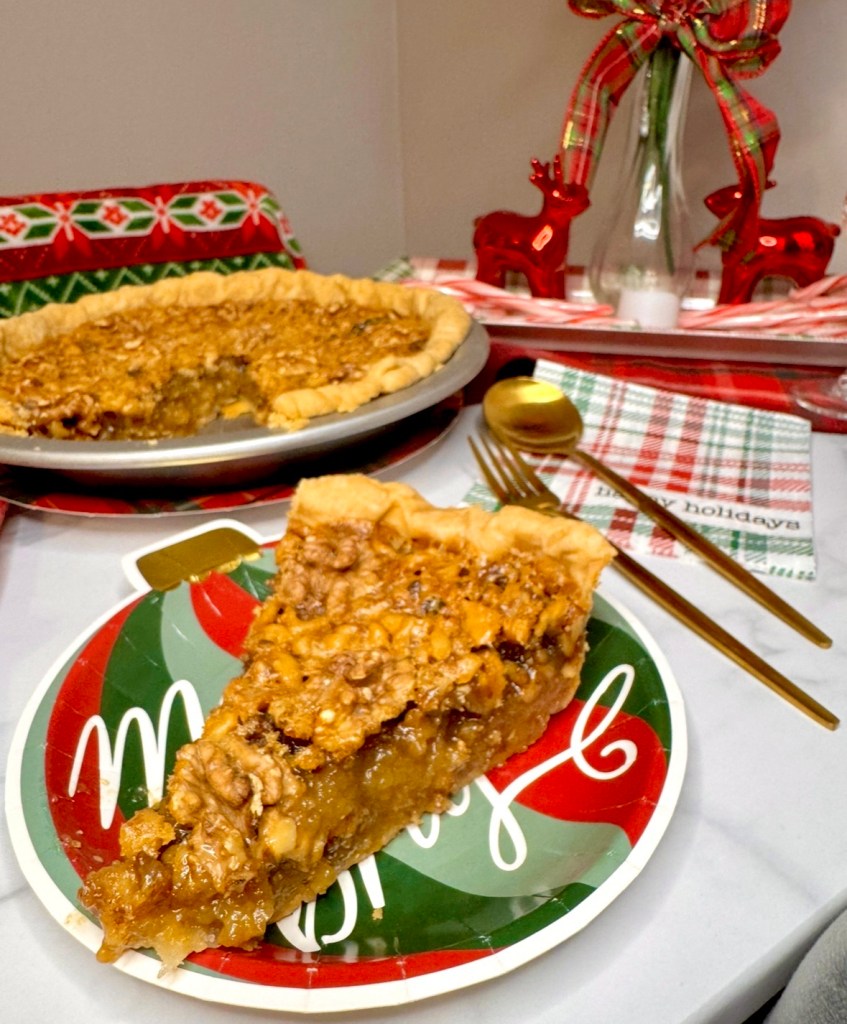
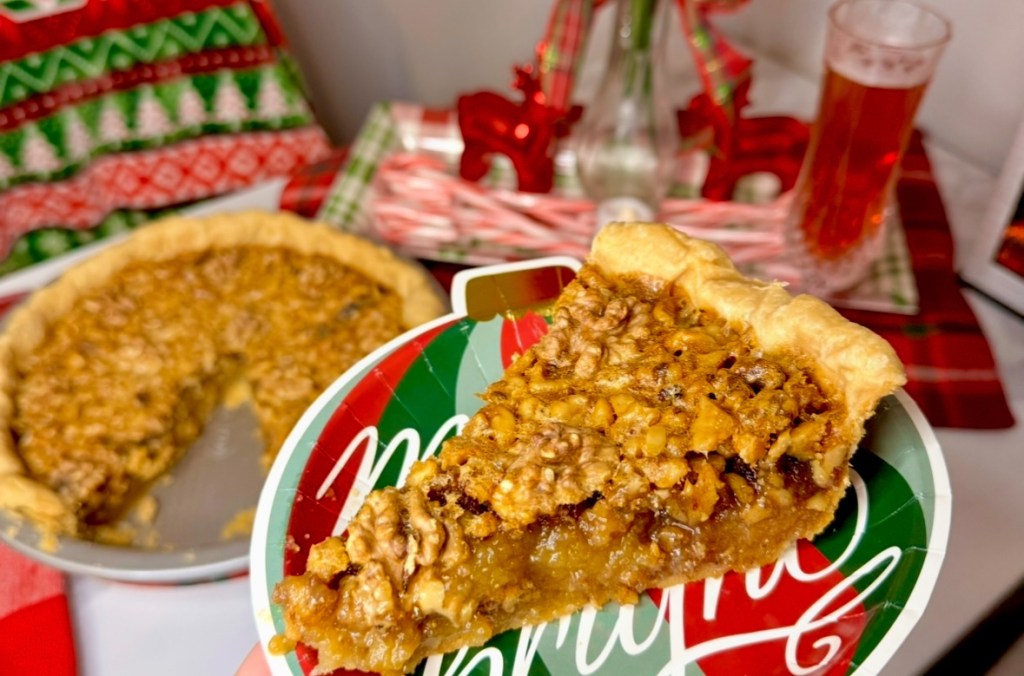
I used walnuts for this walnut pie, obviously, but you can certainly use pecans for a traditional pecan pie, or any nut, really. I’m curious to try a pistachio pie next! Just make sure your nuts are crushed and add them to the bottom of your par baked pie crust. It is better to add your nuts to the bottom this way in making a walnut or pecan pie instead of mixing them in the filling because they tend not to be evenly distributed.
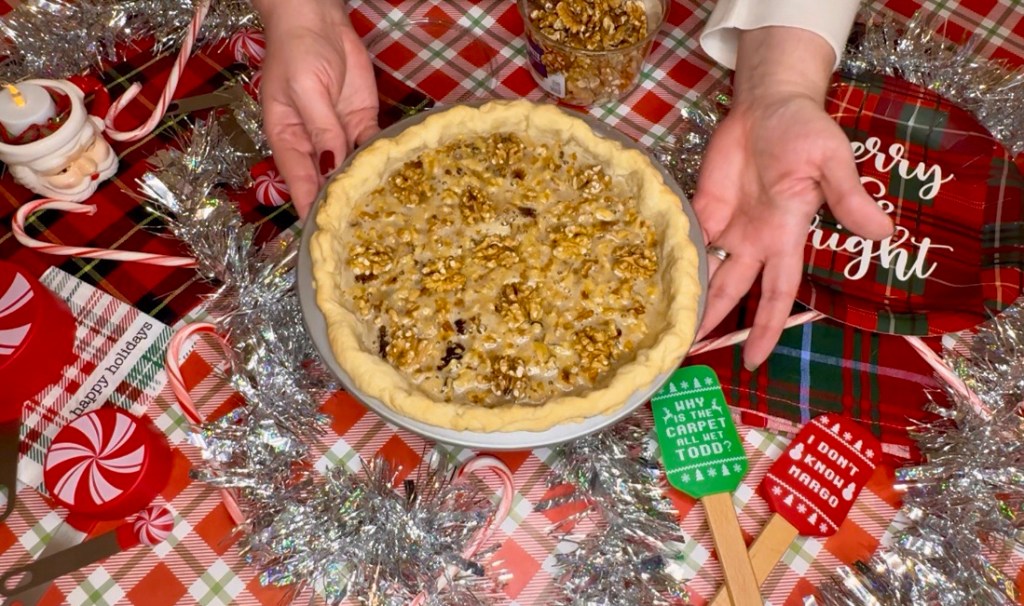
Then when you pour the pie filling on top, the nuts start rising to the top, which is fun to watch. And those nuts and that filling help make that iconic crispy crust on top of your walnut pie. I decorated the top with a couple large halved walnuts but you can’t really tell so you can just skip that step. It looks cooler with pecans for a pecan pie for some reason but not the walnut pie, go figure. Also, I have a vegan pecan pie recipe if you’re ever interested.

She’s a beaut, Clark!

Speaking of national lampoons Christmas vacation, how funny are these Christmas spatulas?! Iykyk
Ingredients:
Pie Crust
- 145g flour
- 1/2 tsp salt
- 1/2 cup cubed butter, cold
- 3-6 tbsp ice cold water
Walnut Filling
- 3 large eggs
- 3/4 cup granulated sugar
- 1/2 cup dark corn syrup
- 1/2 cup light corn syrup
- 1/2 tsp almond extract (you can use just vanilla for a traditional flavor)
- 1/2 tsp vanilla extract
- 1/4 tsp salt
- 1/2 tsp cinnamon
- 1/4 cup melted butter
- 1 1/4 cup chopped walnuts
Directions:
Pie Crust
- Preheat oven to 425°F
- Mix together the flour and salt
- Incorporate cold butter cubes into the flour mixture, either using your fingers, a pastry cutter or a food processor
- Make a well in the center and add ice cold water, starting with a couple tablespoons and add more if needed until just hydrated and dough starts to form
- Roll out dough and fold a couple of times, then form into a disc and cover in plastic wrap and chill for at least 2 hours
- Roll out pie dough to fit in your pie pan and crimp the edges and poke holes with a fork, then chill again
- Add parchment paper and pie weights to your dough and bake 15 minutes. Then remove the parchment and weights and bake another 5 minutes
- Turn oven down to 350°F and begin making your walnut filling while your pie crust cools
- In a large bowl, add your eggs and whisk
- Add your sugar and whisk
- Add corn syrup and whisk
- Add extracts, salt, cinnamon and whisk
- Add melted butter and whisk
- Add chopped walnuts to the bottom of your par baked pie crust and then pour the filling on top
- Carefully move pie to the oven and bake 60-75 minutes, turning halfway
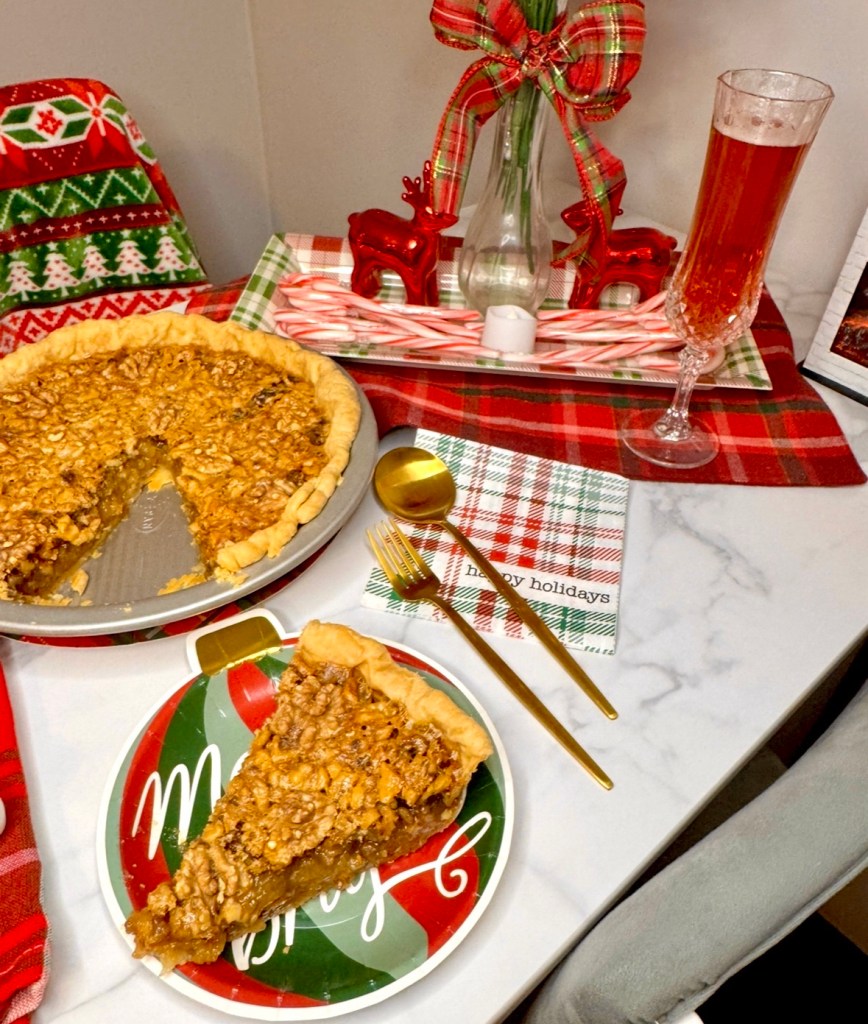
- Let your walnut pie cool completely and store in the fridge.
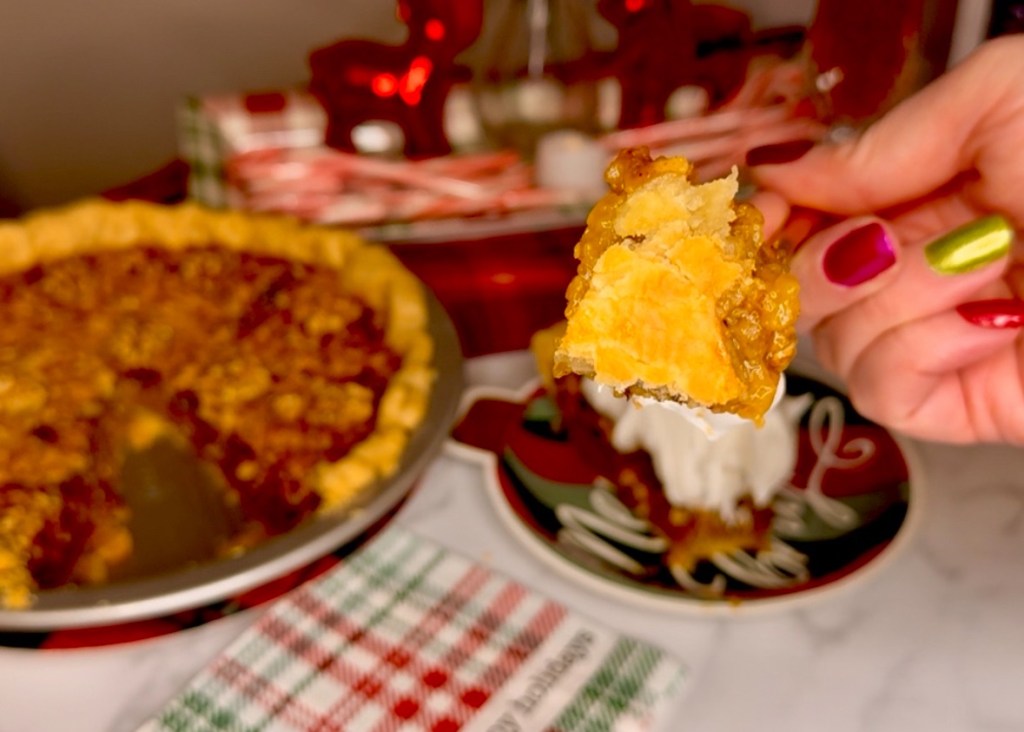
- Top with cool whip and enjoy!
This fireplace wax warmer is so cute, right? I don’t have a regular fireplace to hang my stockings, so this works. You think Santa will fit through this fireplace?

The Christmas blanket and gold flatware give such an elegant yet fun Christmas vibe!

You gotta top your walnut pie with cool whip. The pie serving set is from our wedding!

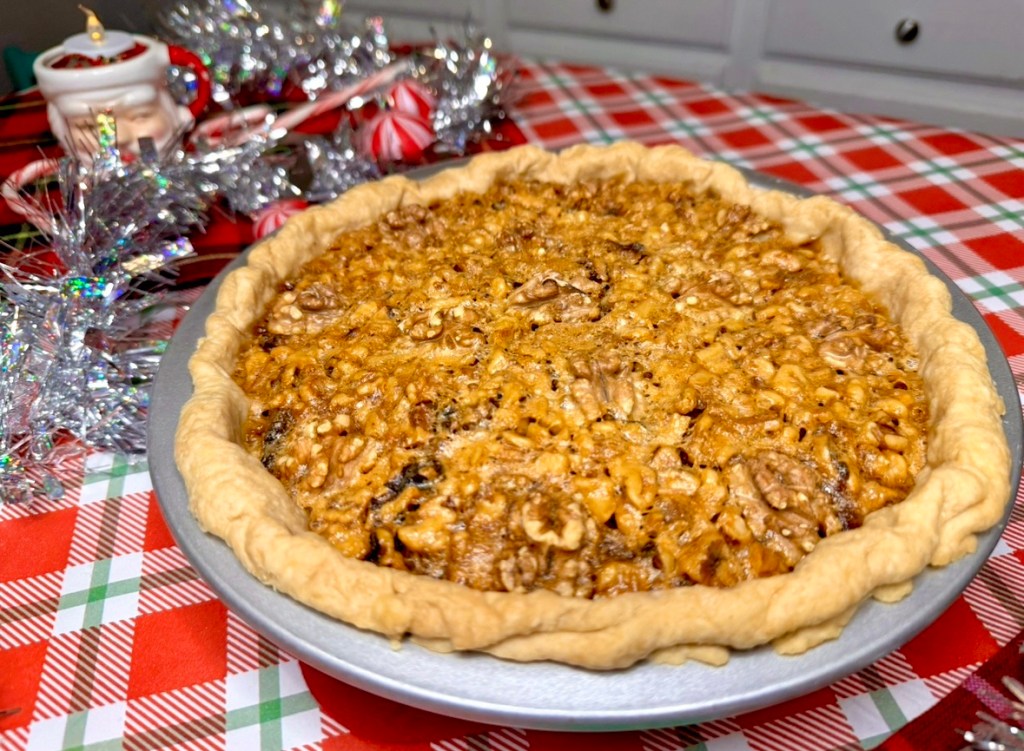
No soggy bottom!
I repeat, NO SOGGY BOTTOM! Sorry I yelled there, I’m just so proud of this pie crust, y’all! I’ve spent a lot of time working on my homemade pie crust recipe!
If you make this walnut pie or pecan pie recipe, please share with me on my social media, I love love LOVE to see your creations! And if you watch my recipe video, tell me what you think of my walnut pie songs I made!
Thank you so much for being here and I hope you have an amazing Happy Holiday and Merry Christmas!

*Disclosure: Links contain affiliates. When you buy through one of our links we will receive a commission. This is at no cost to you. Thank you for supporting Midnight Munchies and More and allowing us to continue to bring you valuable content.

3 Comments Add yours