

I wanted to try my hand at homemade pizza dough for Christmas. My mom said my grandmas pizza recipe wouldn’t taste the same if I didn’t use the kind of dough she used. After some holiday bickering (because it’s not the holidays without it 😂), I decided she was right. But don’t tell her please! Don’t worry, she doesn’t cook, she won’t read this. 😜
Short story, long….I had a packet of active yeast I was itching to use! I just got a new bamboo rolling pin too and the sweet treat lightbulb went off….or maybe it was hormones.
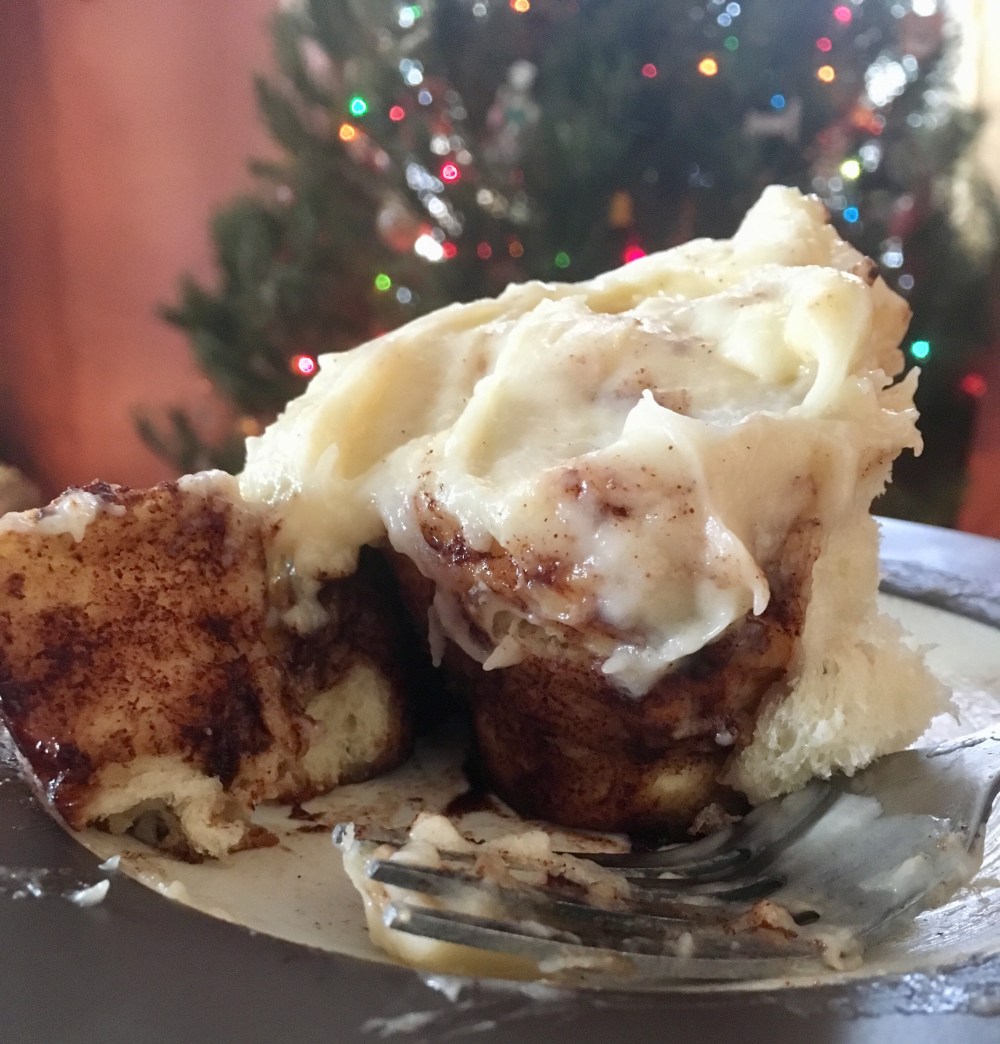
 These turned out splendid! I was so surprised that I made them again for NYE weekend before the ‘resolutions’ kick in! Quotations because they never seem to stick, do they?
I used a vegan cream cheese frosting but you can use any sort of glaze on top.
Ingredients:
• Packet of active dry yeast (about 2 1/4 tsp)
• 1 cup cashew milk (or any milk you prefer)
• 1/2 cup granulated sugar
• 1/3 cup softened smart balance (or Butter)
• 1 tsp salt
• Flax Egg (1 tbsp ground flax seed plus 4 1/2 tsp water)
• 4 cups flour (the first time I made them I only used that much but the second time I had to add about a 1/3 cup more, so just make sure your dough isn’t super sticky and don’t be afraid to add a bit more flour if needed)
Filling:
• 1/2 cup softened vegan ‘butter’
• 1 cup and 2 tbsp of brown sugar
• 3 and a 1/2 tbsp cinnamon
Icing:
• 1/2 cup vegan cream cheese
• 1/2 cup vegan ‘butter’
• 2 cups confectioners sugar (powdered sugar)
- 1/4 cup all purpose flour
• 1 tsp vanilla extract
Directions:
1. Make sure your milk is lukewarm. Not hot! We don’t want ya killing the yeast! If you have to heat up your milk in the microwave or stove, just be super careful not to let it boil. If it does, WAIT until it cools down to add your yeast. Once you’ve added your yeast to your milk, let it hang out and do it’s thing for about 5 mins, until it starts frothing.
2. While your yeast is frothing, add the rest of your dough ingredients in a stand up mixer and let it go to town. It’ll look like a floury mixture and you may be so confused like I was but never fear! It’s supposed to look like that!
3. Change your attachment from the whisky dealy to the dough hook.
4. Once your milk has frothed the froth, add to your flour mixture and let it go to town. When all of the ingredients are incorporated and it’s a dough, stop mixing. You can add a little flour here if you’re dough is too sticky and sticking to your hands and such. Just try not to over knead your dough with the dough hook or else you won’t have much elasticity in your dough for rolling.
5. Put your ball-o-dough in a greased bowl and cover with cling wrap. Let it sit in a warm place for about an hour or has doubled in size. My house is freezing so I actually had to turn my oven on warm and keep it in there for a bit. I think it’s like around 200 degrees Fahrenheit when your oven is just on warm.
6. While your dough is rising, you can go ahead and mix up your filling. Just mix it all together in a bowl and set aside.
7. When you have your risen dough, flip it out of your bowl on a floured surface and roll that baby out in a rectangle shape that’s about 1/4 of an inch thick. You don’t have to be super precise here. My first ones were thinner and my second ones were thicker. It’s just preference at this point.
8. Spread your filling mixture all over your dough, leaving a little edge on the long side closest to you, to seal your roll.
9. Starting at the far end of the long side of your rectangle, start tightly rolling up your roll and gently pinch it shut.
10. You can use a serrated knife to cut your rolls, but I found that to be super difficult so I used thread. You could also use a nonflavored dental floss. If you’re not familiar with this technique, you just grab a piece of your thread and slide it under your roll. Then you make sure it’s the size you want and cross over the two ends of the thread and pull. That will give you a beautifully clean cut of your rolls. The size of rolls here are also preference. Mine were about an inch and a half thick.
11. Place your rolls touching each other in 2 round cake pans (or anything you have, really. I don’t have two so I just made do with what I had. You could also use a cookie sheet if you like crunchiness around each roll and not the pull apart kind)
12. Cover your rolls and let rise again, about 20 mins-30mins. Or you can do what I do and make them the night before and put them in the fridge at this stage. Just remember that when you take them out, you must let them warm up and rise more before you bake them.
13. Bake your rolls at 350 degrees Fahrenheit for about 25 minutes, until golden brown.
14. While they’re baking, you can whip up your icing. I like to spread my icing on the rolls as soon as they come out so it gets all gooey and melty!
15. Enjoy!


Or add a quick vegan peanut butter chocolate glaze! Mix a little natural peanut butter in some cashew milk. Mix some cocoa powder in some confectioners sugar. Then add the peanut butter/cashew milk to the cocoa/sugar mixture slowly until desire consistency!


One Comment Add yours